 ownloads Documentation Centre!
Tags support in jDownloads -June 2025
Introduction
As shown in the picture opposite jDownloads supports the Joomla! Content Tags system. There are four tags showing with Downloads: pdf-file, docx-file, poll-type and image.
This article shows how Joomla! Content Tags may be created, added to or removed from jD Categories and Downloads. It is important to note that jD Categories and Downloads are just as much Content as regular Joomla! categories and articles.
The words 'tag' and 'Tag' are much used to describe a whole host of different items. For example the html character sequence such as <b> denotes the start of emboldening a portion of text, and is often referred to as a tag. It should be referred to as an HTML tag.
In these notes the Joomla! Content Tags, such as the blue boxes opposite, are written here as a Tag or Tags to avoid having to write Joomla! Content Tags. That is Tag with a capital T denotes a Joomla! Content Tag.

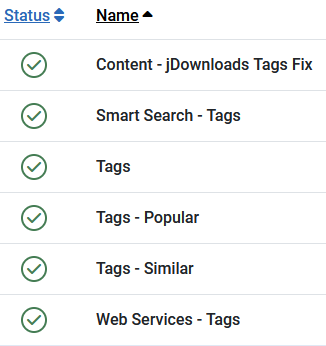
The items installed are listed opposite.
The plugin 'Content-jDownloads Tags Fix' is installed and enabled as part of installing jDownloads.
The other items are installed when Joomla! is installed.
This article does not consider the best ways of using Tags as there are numerous articles on the web that explain the usage of Tags.
All we need note at this juncture is that Tags allow considerable freedom in the way Downloads may be associated and shown. If you are not familiar with Tags then a good place to start is the note How To Use Content Tags in Joomla! (opens in a new tab/page)
Tags may be created or added either directly in Joomla! using the Tags component or directly in jDownloads from the Back End or from the Front End.
After being created, Tags may be added to a Download from either the Front End or the Back End. However they can only be added to a Category from the Back End.
To show Tags then the relevant placeholder needs to be in the layout as noted later.
Any Tags created in jDownloads are 'regular' Tags and may be used in articles and other content just as if they had been created in the Joomla! Tags Component.
Tags may be created or added either directly in Joomla! using the Tags component or directly in jDownloads from the Back End or from the Front End.
After being created, Tags may be added to a Download from either the Front End or the Back End. However they can only be added to a Category from the Back End.
To show Tags then the relevant placeholder needs to be in the layout as noted later.
Any Tags created in jDownloads are 'regular' Tags and may be used in articles and other content just as if they had been created in the Joomla! Tags Component.
Configure Tags Component
Set Entry Mode to AJAX
One item that needs to be checked is that in  ,
, then at top right, click on
 , select
  tab. The 'Tag Entry Mode' option must be set to AJAX mode for tags to work in jDownloads.
The 'Nested' Mode is not supported in jDownloads. AJAX mode is the default.
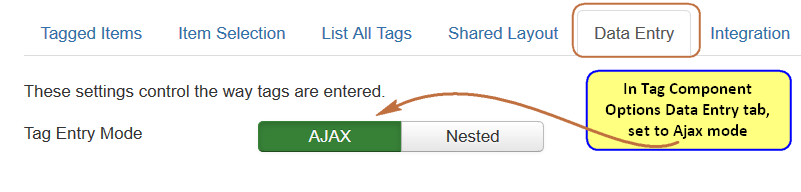
, then at top right, click on, select tab. The 'Tag Entry Mode' option must be set to AJAX mode for tags to work in jDownloads.The 'Nested' Mode is not supported in jDownloads. AJAX mode is the default.
Adding Tags in jDownloads Backend
This section shows adding Tags to jD Categories and Downloads from the jD backend.
Adding First Tag
In this example we use a Download called 'KompleteKontrolMacro'. In  click on
  and find the Download to which you wish to add a tag. Click on the Download title.
The tag 'setting' is in the righthand column, so scroll down to find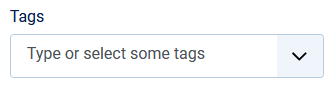 . Simply type in the name of the tag such as 'My First Tag'.
At this stage the Tag entry looks like . Now the important action is to press the keyboard 'Return' key. The view now becomes
 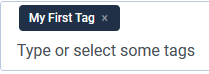 . This shows the tag has been processed and saved in the 'Tags' database.
Then use the button to exit editting the Download
click on and find the Download to which you wish to add a tag. Click on the Download title.The tag 'setting' is in the righthand column, so scroll down to find
. Simply type in the name of the tag such as 'My First Tag'. At this stage the Tag entry looks like
. Now the important action is to press the keyboard 'Return' key. The view now becomes . This shows the tag has been processed and saved in the 'Tags' database.Then use the
button to exit editting the DownloadIf you look at the Downloads in the Front End then the view is like the image opposite.

Adding Further Tags
Now that the very first Tag has been added there is a slight change in the procedure when adding more Tags to any jD Download or Category.
As before scroll down toin the right hand column. It is the same location in a Cateory or a Download. This time, for a Download. it will look like 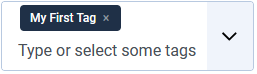 as we ave already added a Tag to a Download, but for a Category it will look like as that is the first Category tag.
When adding a further Tag actions are a little different. As you start typing in the second tag a message appears under the tag input.
What happens is that the Tag component automatically sees if there is all ready a tag with the same or similar name.
After typing in the full name, such as Second One, and pressing the 'Retun key', the view is now like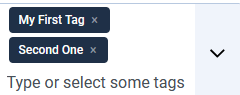 .
.
As before scroll down to
in the right hand column. It is the same location in a Cateory or a Download. This time, for a Download. it will look like as we ave already added a Tag to a Download, but for a Category it will look like as that is the first Category tag.When adding a further Tag actions are a little different. As you start typing in the second tag a message
appears under the tag input. What happens is that the Tag component automatically sees if there is all ready a tag with the same or similar name.
After typing in the full name, such as Second One, and pressing the 'Retun key', the view is now like
.In the Backend, If you go to  -
-  you will see the Tags listed
 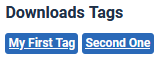 . Also, in the back end, you can add Tags to a Category in the same way as used for Downloads. They are also shown in the
  , for example
  .
.
NOTE: Tags cannot be added to jD Categories in the Front End.
- you will see the Tags listed . Also, in the back end, you can add Tags to a Category in the same way as used for Downloads. They are also shown in the , for example .NOTE: Tags cannot be added to jD Categories in the Front End.
Adding Tags in Frontend
Set Permissions in Tags Component
It is essential to set the relevant Permissions in the Tag Component for the User Group(s) allowed to edit or create Tags in the Front End. In this exampe we have used the Publisher User Group.
To set Permissions in the TAGS Component click on then on . Next, at top right, click on . This opens up a set of Tabs so click on  . In this exampe click on
 which turns to
  when you click on it.
To set Permissions in the TAGS Component click on
then on . Next, at top right, click on . This opens up a set of Tabs so click on . In this exampe click on which turns to when you click on it.This will bring up the permissions settings screen for the Publisher User Group.
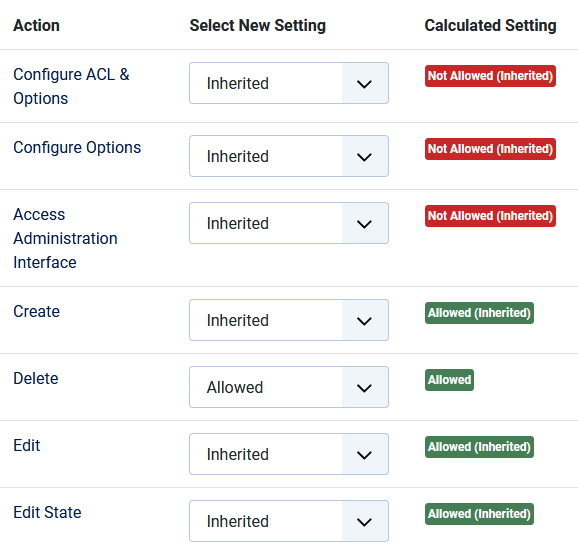
So select the relevant User Group whose members will be allowed to manage Tags in the front end. We are only concerned with Create, Delete, Edit and Edit State.
Usually some of the Permissions are inherited from the Registered User Group
Set up the permissions as indicated opposite. In the central column, if not set to 'Inherited' use the
 to select 'Allowed' as indicated opposite.
Then
.
Adding Tag in Front End with Tag Component
After setting up the Tags component permissions, then Adding Tags in the Frontend is basically the same as adding them in the Backend.
The Tags field in the upload form looks much the same as the one in the Backend.
In the front End it appears in the Publishing tab
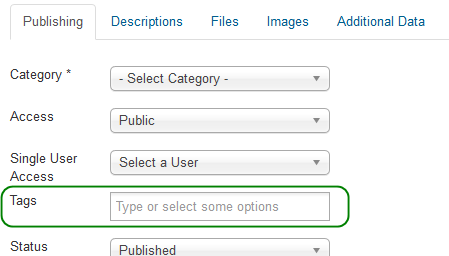
But we need to make the Tags field appear in the edit/create Download form and also to decide whether the User Group will or will not be able to create new Tags.
Both the ability to add Tags and create Tags are controlled from the jDownloads User Groups Settings. This allows different abilities for different User Groups. To find the User groups settings , cick on, then on . Next click on  . You need to decide which User Group will be able to add Tabs from the front end. In this example it is the Publisher User Group, so click on
There are two setting that need to be checked. Both are in -
- tab
tab
Both the ability to add Tags and create Tags are controlled from the jDownloads User Groups Settings. This allows different abilities for different User Groups. To find the User groups settings , cick on
, then on . Next click on . You need to decide which User Group will be able to add Tabs from the front end. In this example it is the Publisher User Group, so click on There are two setting that need to be checked. Both are in
- tabScroll down to find 'Allow creating tags'. Ensure it is set to Yes.

The second setting is in the , which is basically a set of tick boxes, The Tags 'tick box' is in the
  section as indicated opposite.

, which is basically a set of tick boxes, The Tags 'tick box' is in the section as indicated opposite.Using the Batch facility
Sometimes there is a need to add the same Tag to multiple Downloads. Using the jDownloads Batch facility simplifies the process.
In the backend it enables adding the same Tag to selected Downloads that are in a specified category and its subcategories.
In the backend it enables adding the same Tag to selected Downloads that are in a specified category and its subcategories.
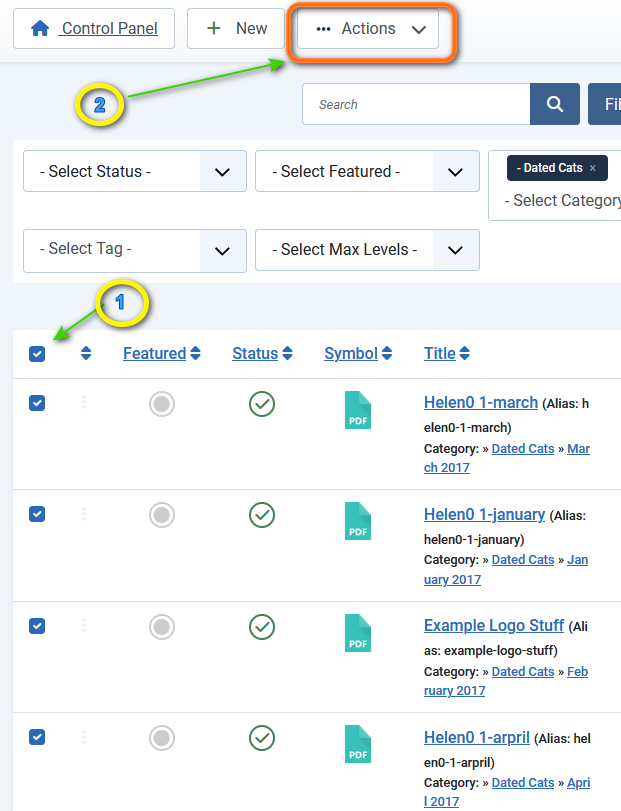
The first step is to go to Downloads and by using the Search Tools select the relevant Category or sub category, which in this example is the 'Dated Cats' category.

This lists all the Downloads in that Category and its subcategories as illustrated opposite.
In this example the selected Downloads are actually in separate sub -categories.
Select all the Downloads by clicking on the top selector as indicated by the 1.
Next click on Actions Pulldown as indicated by the 2.
To add the required Tag to all of the selected Downloads click on the
 button on the control bar.
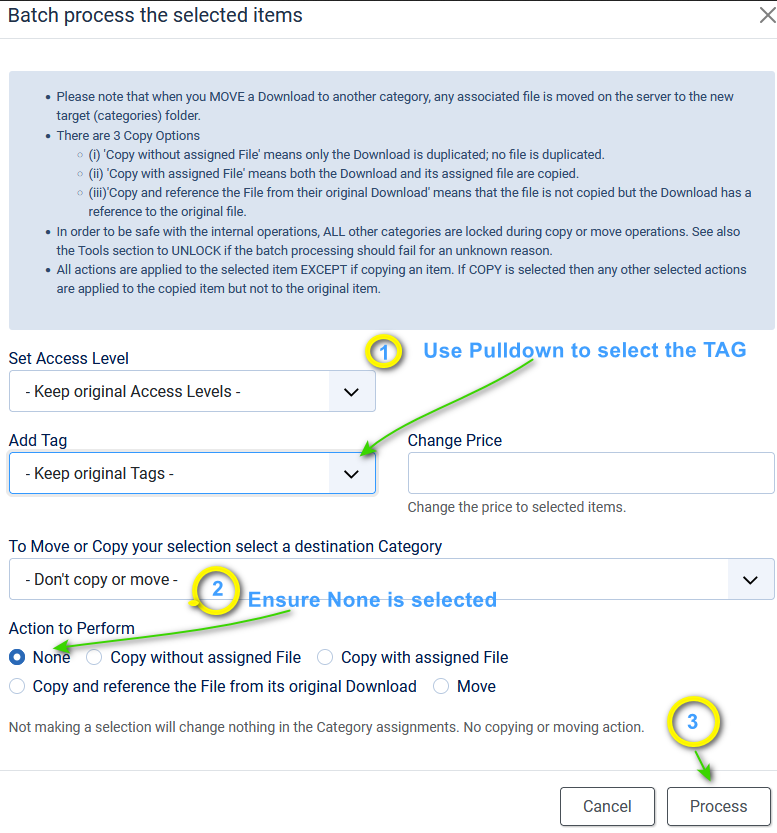
This will give a view as illustrated opposite.
1. Use the pulldown to select the required Tag.
2. Ensure that None is selected
3. Then click on the Process button which will now add the Tag to all the selected Downloads.
View Tags in the Control Panel
The jDownloads Control Panel shows the Tags that are being used in Categories and Downloads.
Clicking on a Tag, for example
 , will show the relevent Categories or Downloads that have that Tag as illustrated on the far right.

View Access and Permissions
If you have set some permissions that say restrict downloading to Registered or to other specific user groups then also remember to set the view Access on the Category or Download appropriately. This avoids showing the 'you do not have permission' message.
If, for example, you have set a Download to only say Registered users may download then also set View Access to Registered.
If it is left at Public then the Download, or Category, will be included in the relevant Tag listing but if a user clicks on it they will get the message 'You do not have Permission' or similar.
If, for example, you have set a Download to only say Registered users may download then also set View Access to Registered.
If it is left at Public then the Download, or Category, will be included in the relevant Tag listing but if a user clicks on it they will get the message 'You do not have Permission' or similar.
Menu Settings for Tags
Each jDownloads menu type that shows Categories or Downloads has a field, Show Tags, that allows Tags to be shown or hidden when that menu item is used.
The default setting is Global. That is it will use the same setting as specified for Tags in the Joomla! global setup.
This ensures that existing menus will not need modification, but at the same time gives another degree of flexibility.

Specifically the relevant menu types are listed opposite.
In most menu types the "Show Tags" field is in the List Layouts tab, but in the Single Download type it is in the Options tab.
In most menu types the "Show Tags" field is in the List Layouts tab, but in the Single Download type it is in the Options tab.
- List All Categories (Default);
- List All Downloads;
- List my Downloads;
- Single Category;
- Single Download.
{tag} placeholder in Layouts
To show Tags associated with a Category or a Download then the place holder is already included in the following Layout Types:
- Standard Categories Layout
- Standard Subcategories Layout
- Standard Category Layout
- Downloads: Compact Files, Compact Fileswith Checkboxes, Files Full Information, Files Single Line, Standard Files, Standard Files with Checkboxes, Standard Files without Checboxes
- Download Details: Example Details, Example Details with Tabs, Details-Full Info (Related), Details Full Info
In these standard layouts it is located in the main part of the layout.
For Download and Download Details layouts typically have a line such as <div class="jd_tags39 jd_associations">
This placeholder is not available for Summary layouts.
For Download and Download Details layouts typically have a line such as <div class="jd_tags39 jd_associations">
This placeholder is not available for Summary layouts.
More Configuration Items
Setting Display
If the Tags component is left as installed then if you click on a Tag it will just show a simple linked list of all the Downloads with that Tag.
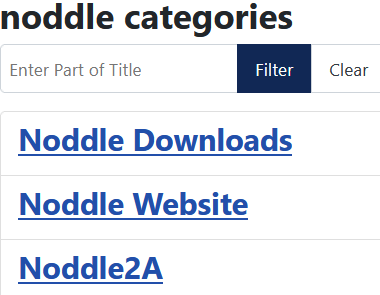
The Tags component provides many options for showing how the list is displayed.
To access these click on the Options Button in the Tags Component.
This shows a whole set of tabs to allow customising as illustrated opposite.
It is not the intention here to discuss all of this as there are several web articles on the topic of configuring the Tags list.
However it is useful to note one specific item which if enabled will show the Short Description associated with the Tags List.
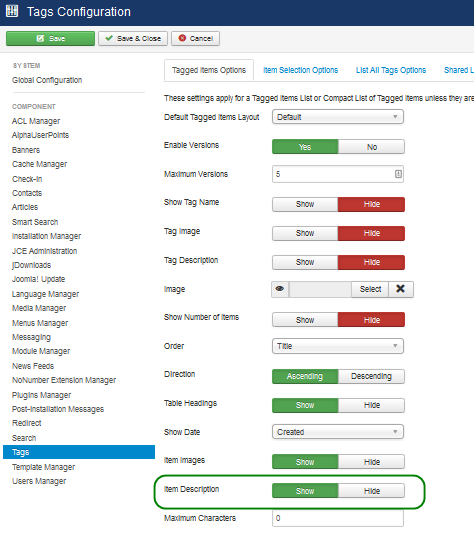
After setting the field Item Description in the Tagged Items Options tab to Show then the Short Description from the Download will be shown in the Tag list.

You can limit the size of the description shown by setting the Maximum Characters option.
The result is then as shown opposite.
Of course one may add appropriate styling and organise the layout in different ways.
Note: Presently the images associated with a Download are not shown.

Of course one may add appropriate styling and organise the layout in different ways.
Note: Presently the images associated with a Download are not shown.
Limitation
jDownloads has a directory based structure with Categories and Downloads just like Joomla! with Categories and Articles.
An added feature in the Tags in Joomla! Articles is that the Tags system checks if the Category containing the Article is Published. If the Category is Unpublished then the Article is not listed in a Tags list view.
This feature is not available in jDownloads.
The reason for this is that the reference to the Categories table in the Joomla! core code is hard coded to the Joomla! categories database! The Joomla! people are 'unwilling' to change that aspect.
An added feature in the Tags in Joomla! Articles is that the Tags system checks if the Category containing the Article is Published. If the Category is Unpublished then the Article is not listed in a Tags list view.
This feature is not available in jDownloads.
The reason for this is that the reference to the Categories table in the Joomla! core code is hard coded to the Joomla! categories database! The Joomla! people are 'unwilling' to change that aspect.
So if you want to prevent Tags associated with an unpublished Category listing the Downloads in that Category, then it is necessary to unpublish both the Category itself and the Downloads in that Category.
It is of course very simple in the jD backend to unpublish all the Downloads. Go to the Downloads section, use the Select Category box to select the category. This will list all the Downloads in that Category together with those in subcategories of the selected category.
Next click on the tick box beside the Title column. This selects all the items listed so then click on Unpublish button.
It is of course very simple in the jD backend to unpublish all the Downloads. Go to the Downloads section, use the Select Category box to select the category. This will list all the Downloads in that Category together with those in subcategories of the selected category.
Next click on the tick box beside the Title column. This selects all the items listed so then click on Unpublish button.
We must make it clear that Tags are supported in both jD Categories and Downloads.
Appendix - Some Examples
The following gives examples of the use of two Tag related menu items
One useful menu item is the "Compact list of tagged items" type where one specifies the specific tag whose items are to be listed.
As shown opposite this may optionally have a description about the tag type, and various images.
The main purpose of the menu item is to list all the related articles and Downloads that have been 'tagged' with that Tag, which in this example is 'pdf download'.
The listing has an option to select which date is shown. Probably the most useful is the 'Modified Date' as illustrated.
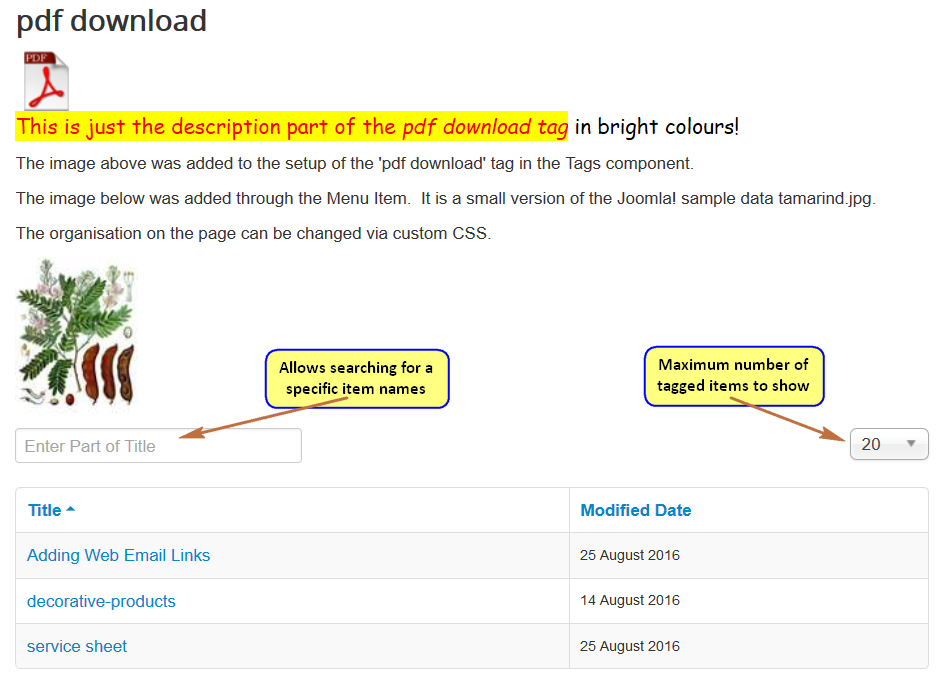
Note that with jDownloads in order for the modified date to be changed then field "Mark Download as Updated" has to be set to Yes.
This is deliberate so that the person carrying out the edit of a Download can select whether the change is actually an update.
For example correcting or extending the description part of an update may or may not be considered as an update. jDownloads cannot make such decisions itself to satisfy all situations. One can leave the field set to Yes of course so that any change will rate as an Update and always change the modification date.
This is deliberate so that the person carrying out the edit of a Download can select whether the change is actually an update.
For example correcting or extending the description part of an update may or may not be considered as an update. jDownloads cannot make such decisions itself to satisfy all situations. One can leave the field set to Yes of course so that any change will rate as an Update and always change the modification date.
Another useful menu item is the 'List of all tags' item.
This gives a view such as opposite, which can be a little disjointed in view.
Clicking on one of the tag names will then list all the items with that tag
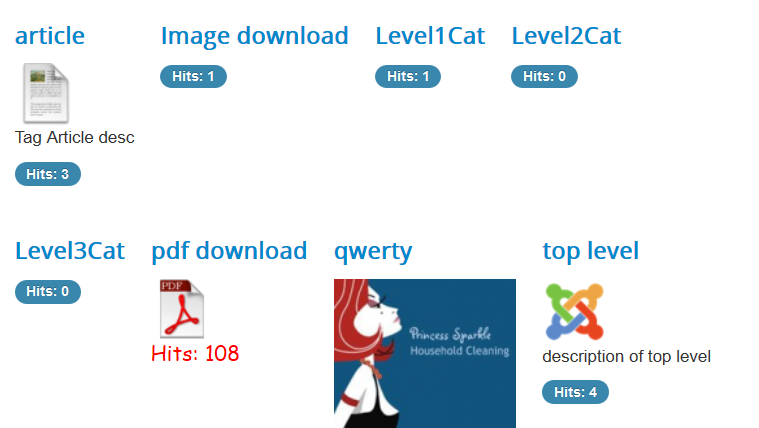
One can of course change the view by adding CSS such as illustrated opposite.
Here the CSS for a border and some separating padding has been added.
style="border:2px solid grey;padding:10px;}
The menu supports selection of number of columns.

ColinM, October 2019, updated August 2020, April 2025, updated June 2025
 jDownloads is an extensive Download Manager for the award winning Content Management System (CMS) Joomla. It is a free GPL Extension with many