 ownloads Documentation Centre!
Adding images to a Download -Aug 2024
Introduction
As well as adding text to describe the contents of a Download one can also add multiple images, audio previews and video previews.
This article deals with adding images to a Download. See adding audio and video previews (opens ina new window/tab) for adding those types of preview.
As always the actual display of what is shown and how it is shown in the front end view is determined by the active layout and the relevant Options settings.
Usually the image would be assciated with the downloadable file so as to give the user more information but that is not a requirement.
It could just be some arbitrary image to make the view more interesting as illustrated opposite!
It could just be some arbitrary image to make the view more interesting as illustrated opposite!
The two layout types that show images are 'Downloads' and the 'Download Details'.
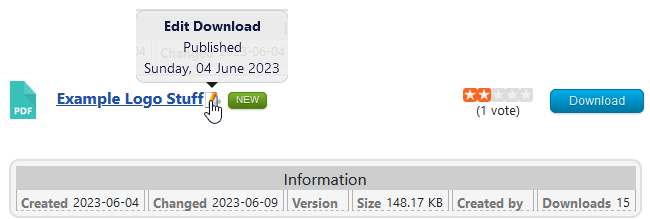
In the layouts, for historic reasons, images are referred to as 'screenshots'. After adding an image the result in the Downloads view is shown as a thumbnail like the one shown above.
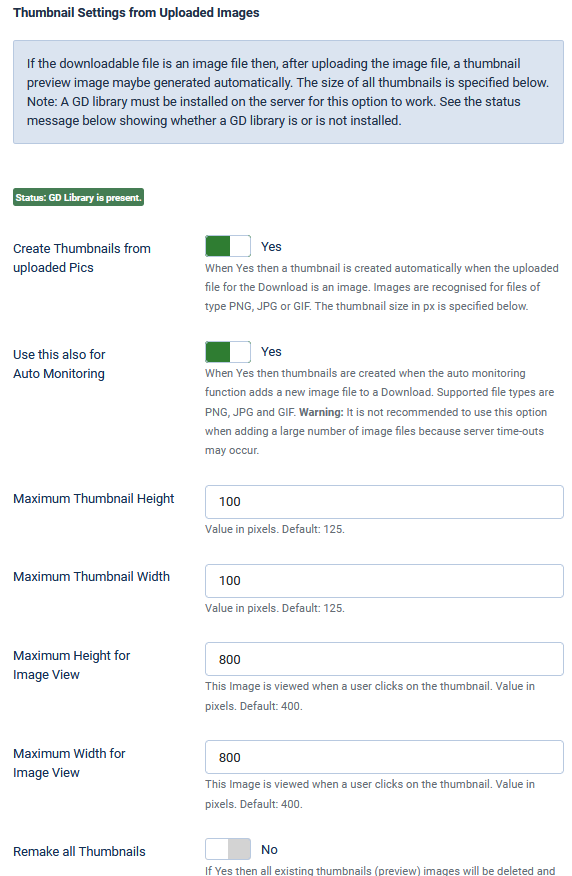
Check GD Library Installed
When creating thumbnails from PNG, JPG or GIF files, jDownloads requires that the PHP function GD Library has been loaded.
To check if the GD Library is installed then goto -
-  -
-  then Scroll down to Thumbnail Settings from Uploaded Images
To check if the GD Library is installed then goto
If it is installed then a message is shown in the basic settings. If it is not installed then a message
 will be shown. Including the GD library is part of the your website/PHP setup. It is normally included. Seek advice from your hosting service if it is missing.
Adding an Image
When an image is added to a download then jDownloads may be set to automatically create a thumbnail picture.
For automatic creation set option Create Thumbnails from uploaded Pics to Yes.
Thumbnail versions will be created automatically to the specified size.
The Aspect ratio is maintained as only the largest dimension of the image is matched to the relevant maximum.
If you already have some thumbnails but you wish to change their size then after setting the new sizes, set option 'Remake all Thumbnails' to Yes.
When Finished click on
After resizing jDownloads will reset the option Remake All Thumbnails to 'No'.
The thumbnail is shown by the active Downloads or Download Details layout.
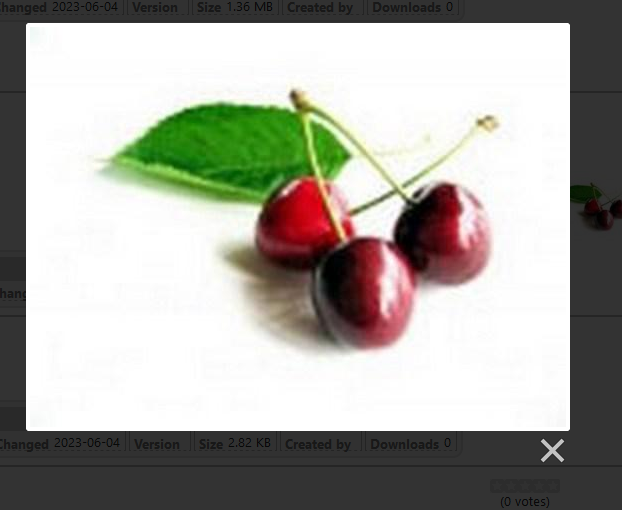
If you click on the thumbnail
 then a Lightbox function is actioned in a separate window showing the image at full size with a darkened background.
 Use the X to dismiss Lightbox.
Note: All Download image directories are stored in the Joomla! subdirectory: /images/jdownloads/. By default none of these images are deleted if jDownloads is uninstalled.
Adding Images
Images may be added Automatically or Manually. Automatic image creation may occur in certain situations as noted in the jDownloads Options section below.
Images may be added from the backend Admin or from the Frontend 'Create or Edit Upload' form.
Assuming that you wish to have thumbnails then the first step is to goto jDownloads and select the  tab. Scroll down until you eventually find option
 . Ensure it is set to Yes as shown.
Images may be added from the backend Admin or from the Frontend 'Create or Edit Upload' form.
Assuming that you wish to have thumbnails then the first step is to goto jDownloads
In backend
To add one or more images from the backend select  and then click on the relevant Download which is to have an image added. Or create a new Download. Note that the image is independant of the downloadable file.
Select the Additional DataTab. Find the Add an Image option which is usually on the right hand side. 
Click on the Browse button and select the image from your device.
Several images may be added if required. Here two have been added.
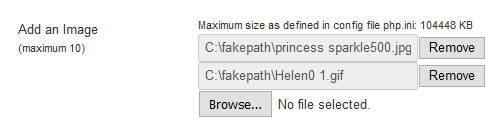
Several images may be added if required. Here two have been added.
The images will be uploaded when you  or
or  . Assuming you have set option Create Thumbnails from uploaded Pics to Yes then thumbnail versions will be created automatically.
If you look at the Download again you will see that thumbnails of each image have been added.
To remove an image then click on the near the top left corner. The image will be removed when you do a or a.
To remove an image then click on the
You may also view the image at full size in a separate tab or window by clicking on it.
In frontend
Adding an Image from the front end is similarly straight forward.
Either use an Upload menu item to create a new Download (see article Create Download Menu Item) or click on the edit pencil of an existing Download as shown opposite.
Go to 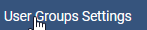 and click on the relevant user group name that is allowed to create or edit Downloads in the frontend. Select the
  and ensure that option 'Use Tabs in Frontend Upload Form' is set to Yes as illustrated opposite.
Using tabs is strongly recommended.

Using tabs is strongly recommended.
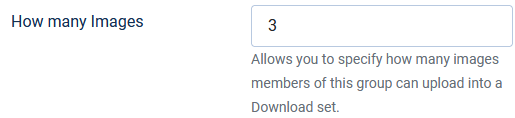
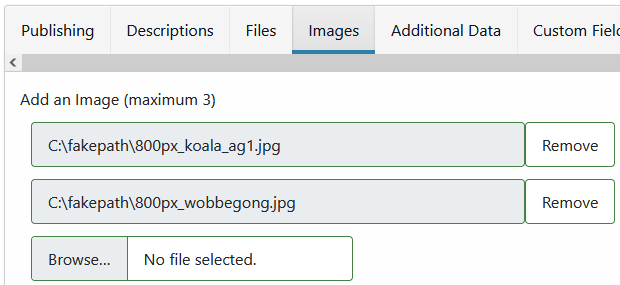
Also in specify the maximum number of images in a Download.
If the Images Tab or section does not appear it is likely that you have not 'ticked' the 'Add an Image' box in the section of the User Groups Settings for the relevant User Group. So scolldown to find the tickbox part
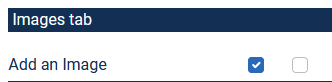
Alternatively it could be that the user belongs to multiple User Groups and you have not 'ticked' the 'Add an Image' box in the relevant User Group with the highest Ranking.
See articles 'An Overview of User Group Settings' and 'Which User-Group is Used?' for more information on User Groups Settings.
See articles 'An Overview of User Group Settings' and 'Which User-Group is Used?' for more information on User Groups Settings.
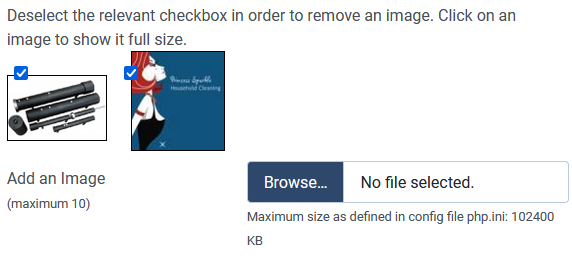
After clicking on the browse button you can select an image from your device.
In this example two images have been selected.
The first one is a Koala and the second one is a wobbegong, both of these are Joomla! demonstration images.
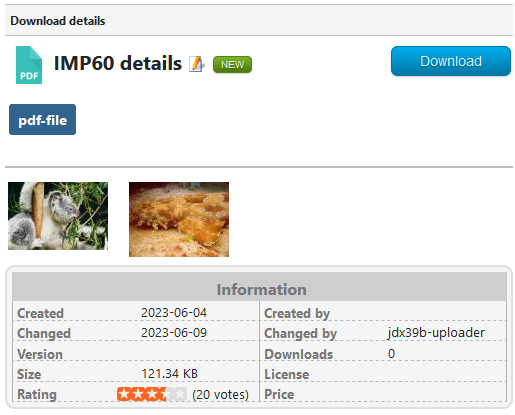
The view opposite is a Download Details view.
Note: Downloads only show the first image.
The images are uploaded and saved when you do a or  . As well as saving the main images, jDownloads will optionally make and save thumbnail versions if option 'Create Thumbnails from uploaded Pics' is set to Yes in the options.
The view in the Downloads Details is like that on the far right above. In the Downloads view only the first image will appear as the standard layouts are only configured for one image.
As would be expected, clicking on an image thumbnail will show the full size image in a lightbox view either in the same window or in a separate window/tab dependent upon your browser setup.
Image Generation from PDF files
Note this option requires the Imagmagik library is present. If it is then there will be a status message, in green text, "Status: ImageMagick PHP Module 'Imagick' is present.".
If it is not installed then a message, in red text, appears such as "Contact your hosting service if Imagmagik is not installed.".
If it is not installed then a message, in red text, appears such as "Contact your hosting service if Imagmagik is not installed.".
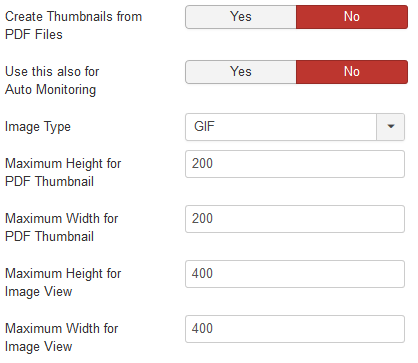
If the downloadable file is a pdf file and if the 'Create Thumbnails from PDF files' is set to Yes these settings will create a preview file and its thumbnail automatically.
This action may also be turned on for auto monitoring.
The preview picture and the thumbnail are generated to the sizes as specified opposite.
jDownloads maintains the aspect ratio, that is only the relevant maximum is used.
How Images are Displayed - Layouts
If one looks at the main part of a Downloads layout the Image is actually displayed by a {thumbnail} place holder. For example a fragment of a part of the "Standard Files Layout" when viewing the raw html code is shown below that is in 'code view' not 'editor' view.
ColinM June 2019, modified Ocober 2020, June 2023, April 2024, August 2024
{screenshot_begin}<a href="/{screenshot}" rel="lightbox"><img src="/{thumbnail}" alt="" /></a>{screenshot_end}
To show a second image then just copy the above line and then add a 2 to make {screenshot_begin} into {screenshot_begin2} and simarly make {screenshot_end} into {screenshot_end2} as illustrated below.
{screenshot_begin2}<a href="https://www.jdownloads.net/{screenshot}" rel="lightbox"><img src="https://www.jdownloads.net/{thumbnail}" alt="" /></a>{screenshot_end2}</div>
Obviously for yet more images add further lines but changing to 3, 4 and so on as appropriate. The 'index' value referes to the order in which pictures were added.
For more details on editing layouts see the Layout documentation.
Obviously for yet more images add further lines but changing to 3, 4 and so on as appropriate. The 'index' value referes to the order in which pictures were added.
For more details on editing layouts see the Layout documentation.
ColinM June 2019, modified Ocober 2020, June 2023, April 2024, August 2024