Introduction
jDownloads supports Downloads that have access restricted to 'Named' users.To demonstrate this facility, Accounts were created for two users, namely Colin Smith and David Jones in an appropriate User Group. The objective is to have Downloads that are restricted to those users indvidually. That is as well as being able to access regular Downloads, Colin Smith and only Colin Smith can access those Downloads whose Access is marked as
Usually these 'private' Downloads are created in the backend by the super user but they maybe created in the front-end by a regular 'uploader'. The 'uploader' could be, for example, a 'supervisor' or 'trainer' who is setting tasks for each individual being "trained". Also a private individual may create downloads in the front end into their own private directory. For example a student could be reporting the results of a tasks they have been set. The supervisor would of course have access to the account of all trainees.
There are two aspects to setup:
(i) one is a menu item suitable to 'Create Download' in the Front-end; (NB this item is not strictly necessary)
(ii) the other is using the 'Single User Access' facility.
Setting up Create Download Menu Item
When setting the frontend Create Download menu item involves setting up a specific user group, basically to set the View Access. The user group needs to be setup before the menu item.

To check all is setup, click on . It shoud show
  with PrivateUserUG as illustrated opposite.
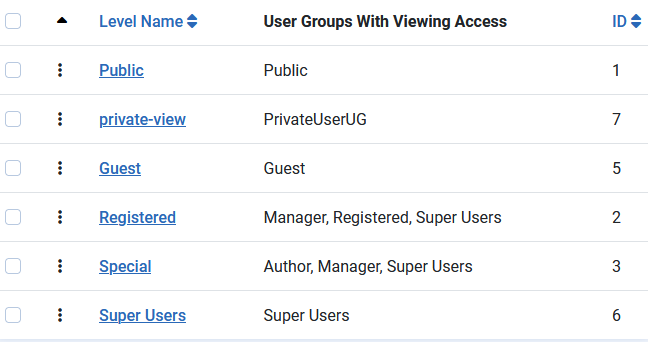

ColinM March 2023, September 2024, April 2025, May 2025, April 2026
Private User Groups Settings
To give clarity and ease of management it it helpful, but not essential, to create a specific user group for the private users, such as one called say PrivateUsersUG. Creating this is done in the Joomla Users section.
Click on  , then in the
  section click on
  then at the top left click on
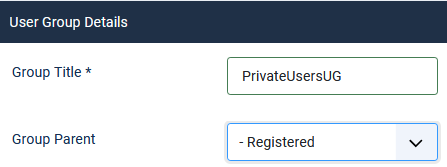
  . Set the Group Title to a suitable name such as 'PrivateUsersUG' and make the parent Registered by using the pulldown. This is to ensure the 'private users' will need to login. Set the Ranking to say 123. Note that whilst the ranking is higher than that of the Super User level, the Private Users do NOT have Admin powers like a Super-User. Click on
 to exit.
Now click on in the lefthand panel, next at top left click on  . Then in tab
  give a suitable name such as 'private-view'. Then again use to exit.
Next click on and then tick on
  to check it is setup OK.
Next click on
To check all is setup, click on
with PrivateUserUG as illustrated opposite.Create menu item
Next we will create a menu item.
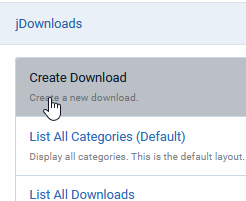
So on the main Joomla Admin view click on and scroll down to and click on
  . This opens up the list of all the existing items in the main menu. As we are adding a new menu item click on the button at the top left. This shows the first stage in creating a new menu item. Now use the
 button which is at the righthand end of the
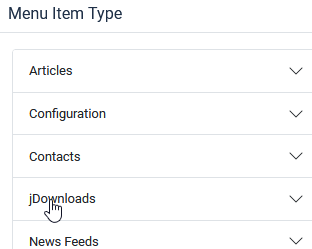
  . This shows a list of Components that have Menu Item types as shown opposite. Next click on
  as indicated.
So on the main Joomla Admin view click on
This then shows another pulldown with a list of the jDownloads specific menu items.
Select the jDownloads Menu Item Type 'Create Download' by clicking on its name.
Ensure it is Published and, most importantly, set the Access to 'private-view'.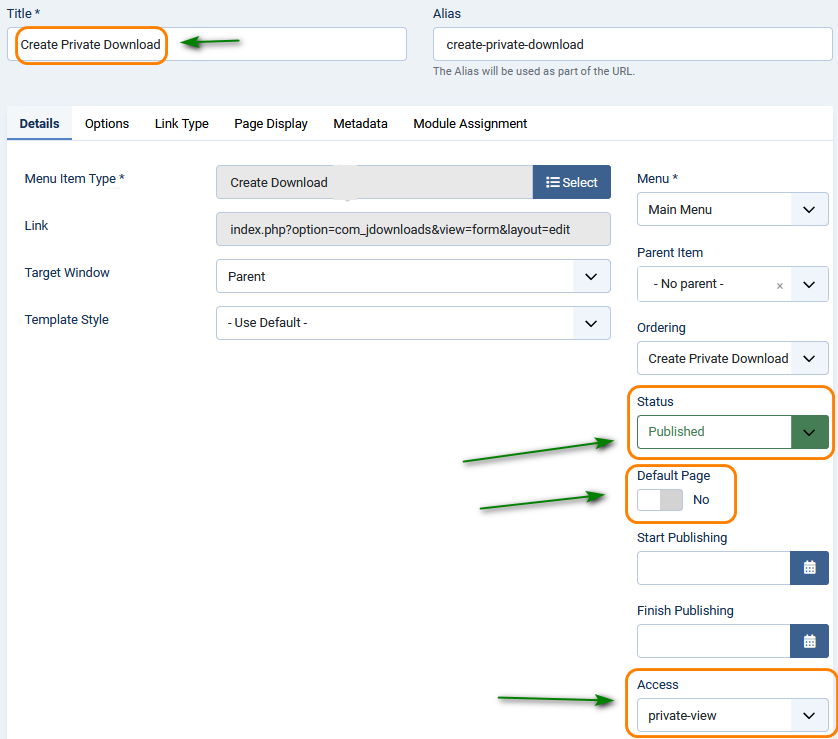
Select the jDownloads Menu Item Type 'Create Download' by clicking on its name.
Ensure it is Published and, most importantly, set the Access to 'private-view'.
This ensures that only the Private Users will see the menu item in the front end as they will be the only members of the PrivateUsersUG user group. Now use .
Next click on the  tab at top right.
The objective here is to ensure that the 'private Downloads' are in this Category and any of its subcategories. For example each Private User could have their own subcategory.
So set the 'Default category' option to Yes. This shows the 'Choose a category' option.
The objective here is to ensure that the 'private Downloads' are in this Category and any of its subcategories. For example each Private User could have their own subcategory.
So set the 'Default category' option to Yes. This shows the 'Choose a category' option.
Use the pull down to select the 'Commercial' category so that the private users are confined to that category tree as illustrated opposite.
You could also use the 'Submission/Cancel Redirect' option to say a 'List All Categories' menu item.
This means that categories and Downoads, and also other content such as articles, that have this Access level can only be seen by members of the PrivateUsersUG in the Frontend. Not even the Super User can see these items in the Frontend. But if we stopped at this stage they would be seen by who ever has access to the backend.
This is where the jDownloads 'Single User Access' is needed. So that is the next stage.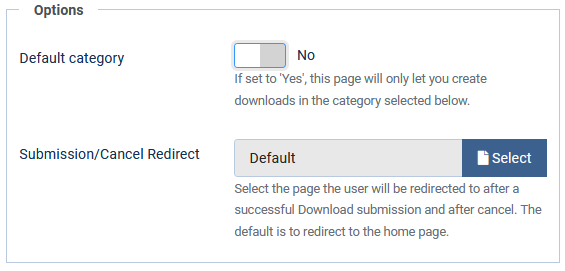
The ability to set 'Single User Access' capability is enabled in the User Group Settings. So on the Joomla Control Panel click on  then
then  and then
  . This shows all the User Groups.
Next click on the appropriate User Group and then on which is the middle tab just below the Ranking level. Scroll down until you see the
  in the 'Data Field Section' section. It is on the lefthand side. This has numerous items with 'tick' boxes.
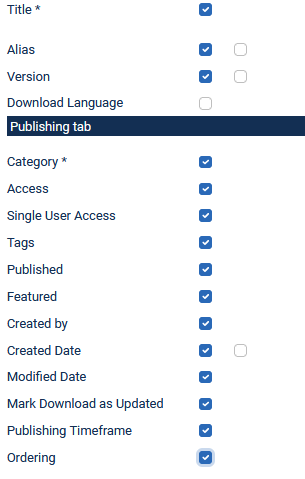
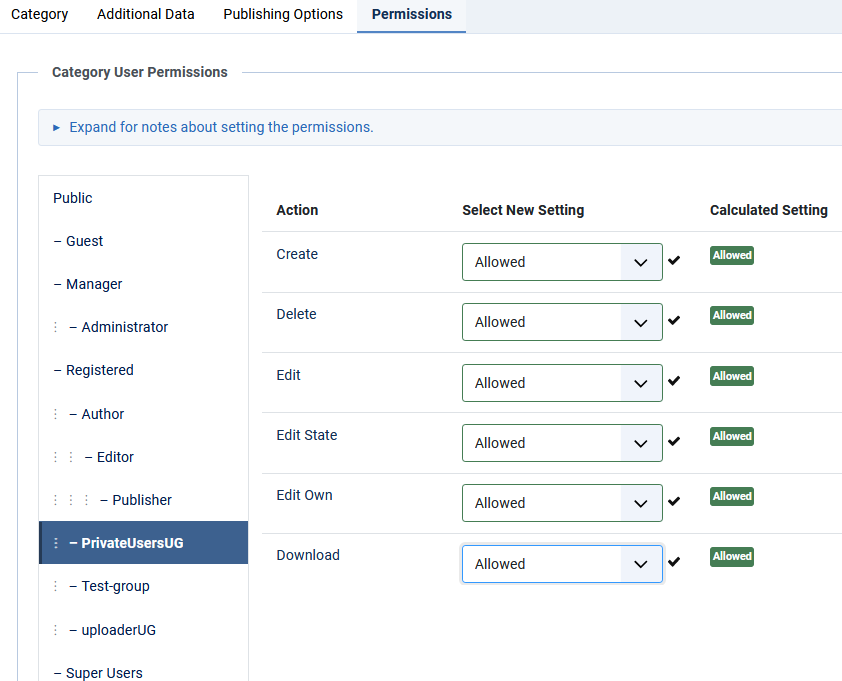
Typically the view is like the first image opposite. To enable 'Single User Access' ensure that it is 'ticked'. Usually I click most items as shown in the image on the far right as that allows more facilities and flexibility.
Now click onto exit.
Note: Ticking the 'Single User Access' means all users in the selected User Group will be single access users.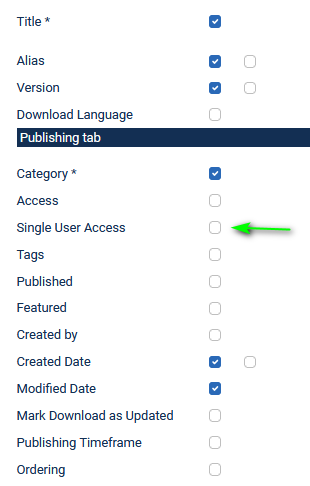
Next click on the appropriate User Group and then on
Typically the view is like the first image opposite. To enable 'Single User Access' ensure that it is 'ticked'. Usually I click most items as shown in the image on the far right as that allows more facilities and flexibility.
Now click on
Note: Ticking the 'Single User Access' means all users in the selected User Group will be single access users.
Create Holding Category
There is a considerable advantage in putting all 'private' Downloads in a single category. Basically one only has to set the appropriate permissions once !!
In this example we create a Category called 'Commercial' as a top level category. Individual 'Private Users' could have their own subcategories. Or all the Private Downloads could be in the top level Category as private users will only see their own Downloads.
In this example we create a Category called 'Commercial' as a top level category. Individual 'Private Users' could have their own subcategories. Or all the Private Downloads could be in the top level Category as private users will only see their own Downloads.
In jDownloads backend select  and then click on the button at the top. This loads the Category Create form.
The Title in this example is set to 'Commercial'.
Ensure the Parent Category option shows 'No parent Category', so that it will be a top level category.
Ensure the Status is 'Published',
And by using the Access pull-down ensure it is set to 'private-view'.

The Title in this example is set to 'Commercial'.
Ensure the Parent Category option shows 'No parent Category', so that it will be a top level category.
Ensure the Status is 'Published',
And by using the Access pull-down ensure it is set to 'private-view'.
Allow Frontend Creation etc.
The next action is to set the Permissions so that members of the Private Users group are able to Create, Edit and Download from the Frontend. In some cases only Download capabilty may be required as the Downloads are created by say the super user in the backend.
In  Click on
  and scroll down to find, in this example the
  category . Click on the Title, that is Commercial, and select the
  tab, select
  and use the pulldowns to select
  for each permission you wish to grant to your private users. In this example a separate Usergroup had been created but it could be one of the standard user groups
Initially each permission changed will have a
 alongside it. This denotes that the Permission has not been saved yet. So click on the
  button and again look at the -to confirm they are now fully set, that is there is no 's. Finally click on
  .
.
Initially each permission changed will have a
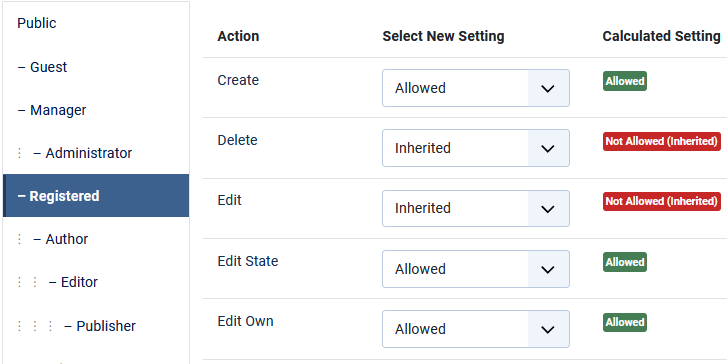
Click on the relevant user group, here it is the Registered group which is being used as the restricted access user group. Set the permissions of the Group appropriately.
This follows the procedure as above but with slightly different settings
It may be unwise to allow Delete and also unwise to allow Edit.
NEVER set a permission to 'Denied'. This has widespread ramifications and many unforseen consequences.
This follows the procedure as above but with slightly different settings
It may be unwise to allow Delete and also unwise to allow Edit.
NEVER set a permission to 'Denied'. This has widespread ramifications and many unforseen consequences.
Create Private Download
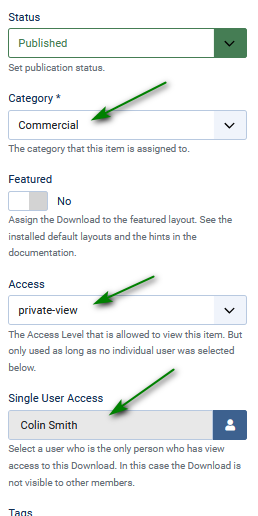
Creating a 'private' Download is just like creating any Download except for one aspect, namely specifying Single User Access.
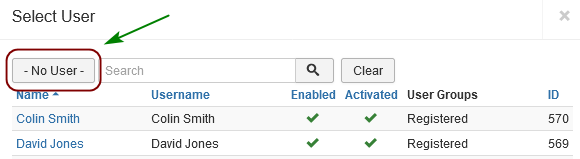
To specify the single user clicking on the 'Select a User' pulldown button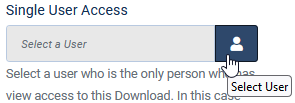 will show a list of users as illustrated opposite.
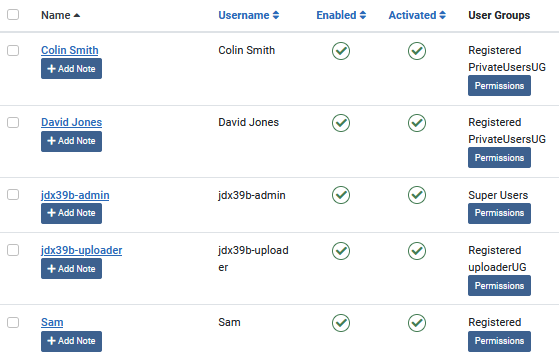
will show a list of users as illustrated opposite.The image opposite shows the Download settings in the General tab
The pulldown in option 'Single User Access' was used to select the relevant user, David Jones in this example.
If jDownloads detects that 'Single User Access' has been set then the Joomla! Access Level is automatically reset during the Save.
This occurs irrespective of which Access Level is selected during either the editing or creation of a Download in both the frontend and the backend.
Remember to Publish!
The image below is from a listing of the Downloads in the backend after setting the Access to 'David Jones' in Download Test-Private.
Change Sole Access User
In the Backend you are able to change the user or set no user. Click on 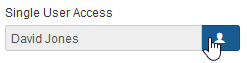 which brings up a view such as shown below. This allows selecting another user or to revert to a regular Download by clicking on No User.
which brings up a view such as shown below. This allows selecting another user or to revert to a regular Download by clicking on No User.ColinM March 2023, September 2024, April 2025, May 2025, April 2026