Preamble
Note: The original creator of JComments has retired and, in consequence, decided not to upgrade to a Joomla 4 version!
The Exstreme organsation has created a free Joomla 4/ Joomla 5 version of JComments. It is totally compatible with the original JComments. In particular, it does not require any changes to the database, so all the existing comments are preserved.
In the overal installation process several files are downloaded.
If you are migrating from Joomla 3 then first read Appendix 1 Migration from JComments 3
Introduction
Comments may be added to a Download by using the free JComments component to give something like that illustrated opposite.
Note: Comments only appear in the Download Details view.
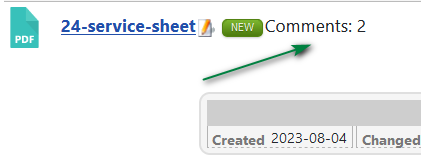
However you can also setup to show the number of comments in each Download by including the placeholder {sum_jcomments} in the active Download layout as shown in the image below.
Configure jDownloads
Setting up the jDownloads part for JComments support is straightforward. In the Joomla! Dashboard click on  and then on
 . Next click on
  and then, at the top right of the view, click on
  . Now select
  tab.
tab.
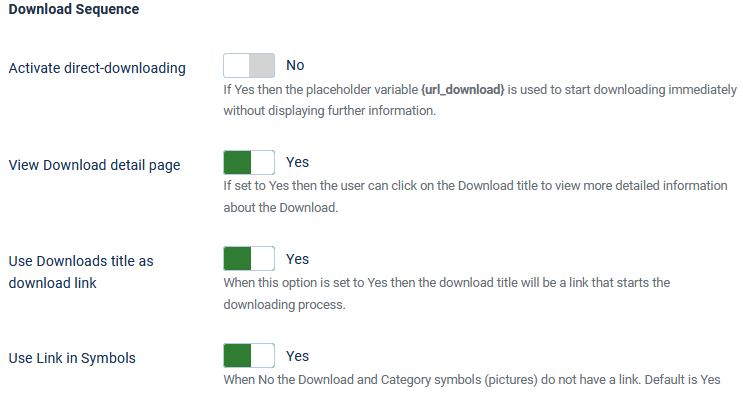
Because comments are only shown in the Download Details view then, as illustrated opposite, it is essential that you also set in the Download Sequence section of the Frontend options. So scroll down to the Download Sequence section.
1. 'Activate direct downloading' to No;
2. 'View Download Details page' to Yes;
3. Set 'Use Download title as download link' to Yes;
4. Also set 'Use link in Symbols' to Yes;
Now scroll down further to the 'Other Options' section.
5. Set 'Activate support for all Joomla content plugins' to Yes.
6. Next scroll down to the Comment Extension Support section, which at the bottom of the 'page'. Set Use JComments to Yes. This also reveals the View number of comments option. So if you wish to show the number of comments in a Download then also set View Number of Comments to Yes.
Show Comments in Download view
To show Comments it is neccessary to make a copy of one of the existing layouts and then add two small modifications. Never directly change one of the standard layouts as they could be modified in an update.
Several of the Layouts in the Downloads section could be used as the basis for showing comments. Avoid those that use check boxes and also the single line layout. Here as an illustration we will use the Compact Files Layout.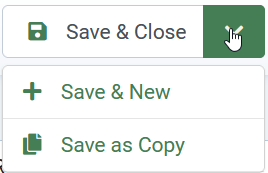
The editted 'Compact Files Layout v3.9 (2)' layout is shown opposite with the modifications described below indicated indicated.
After completing the edits to the layout, click on
After adding {sum_comments} in the modified Download layout, then the number of comments will be shown as indicated opposite when viewing Downloads.
Remove


The above modification prevents the Download button showing and preserves the space and format of the layout.
Again after completing the edits to the Download layout, ensure You click on .
.
The objective in removing the {url_download} is that the user will have to click on either the Download title or the icon so the user goes directly to the Download Details view which is where comments may be viewed or added.
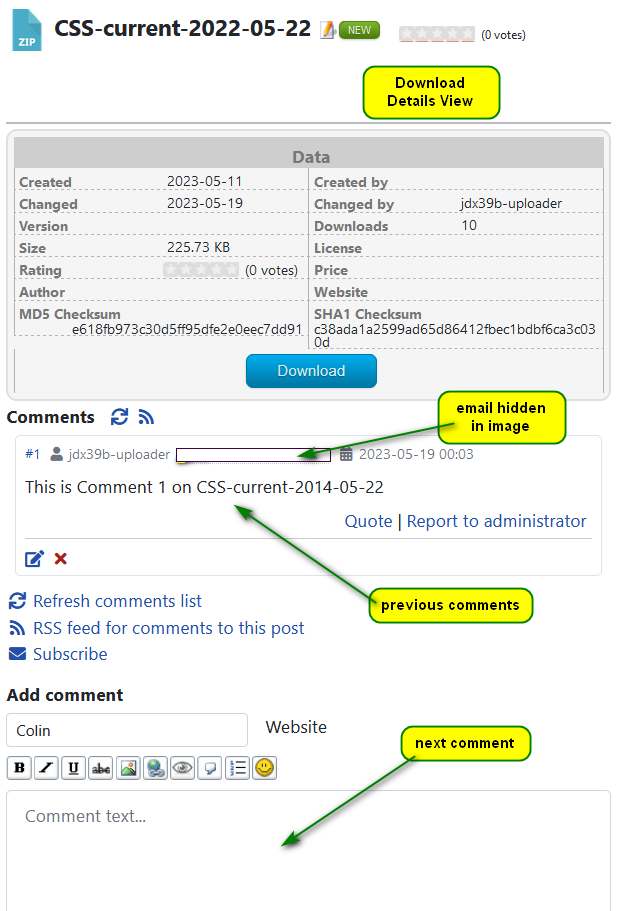
The image opposite shows a view of a Download Details page with comments.
The next step is to install the JComments Component.
In the Joomla main dashboard click on then in the
 section click on
  .
.
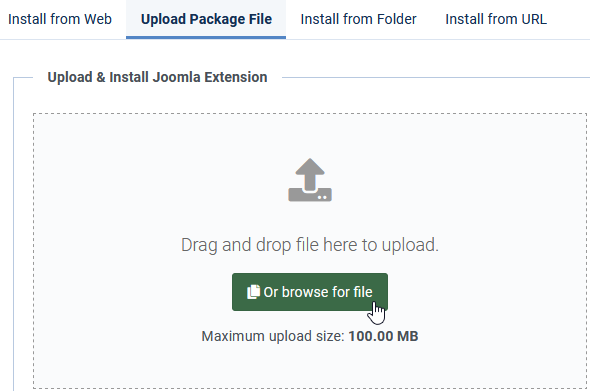
Now either browse for or drag and drop the JComments zip file onto the page like the one shown opposite. This will initiate installation of the the Component.
Whilst installation is in progress Joomla shows an 'In progress bar' as illustrated below.

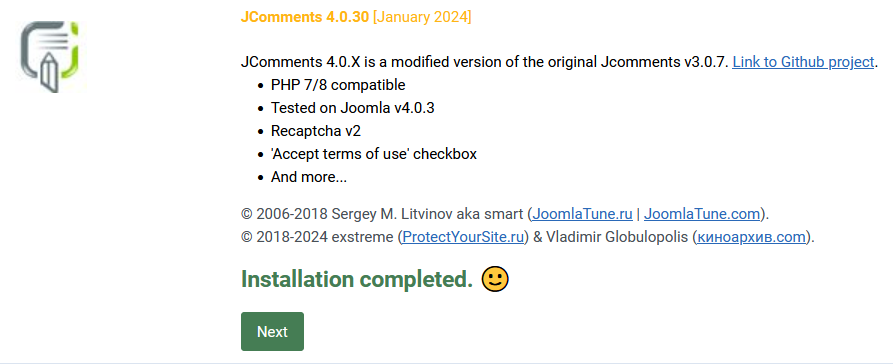
After the installation completes it shows a view such as opposite.
Clicking on the button takes you to the backend setup. But before configuring, load the jDownloads plugin for JComments as described below.
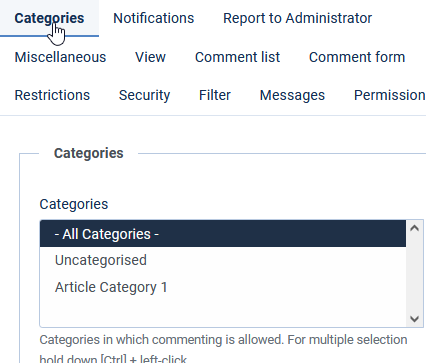
First select Categories from the JComments options and choose which Categories are to be included for adding Comments.
Usually it is simplest to allow All Categories as shown opposite.
Several of the Layouts in the Downloads section could be used as the basis for showing comments. Avoid those that use check boxes and also the single line layout. Here as an illustration we will use the Compact Files Layout.
So again go to and click on  . First make a copy of the layout you intend to use. Select the layout by 'ticking' in the box as illustrated
  . So at the top click on
  . Now click on the
  pulldown. Then click on
  . This will create a layout with the name '
 '. Of course you could change the name of the layout to say "Compact Files Layout for Comments".
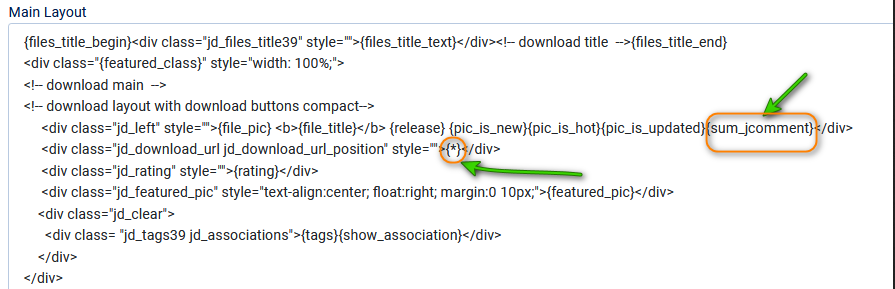
There are two small modifications to the new layout as noted below.
1. Add {sum_jcomments}
2. Replace {url_download} with a * symbol
. Now click on the There are two small modifications to the new layout as noted below.
1. Add {sum_jcomments}
2. Replace {url_download} with a * symbol
Add (sum_jcomments}
In this example we add {sum_jcomments} into the line as shown below. Note the curly brackets.
The editted 'Compact Files Layout v3.9 (2)' layout is shown opposite with the modifications described below indicated indicated.
After completing the edits to the layout, click on
After adding {sum_comments} in the modified Download layout, then the number of comments will be shown as indicated opposite when viewing Downloads.
Remove  button
The objective in removing the is that the user will have to click on either the Download title or the icon as both go directly to the Download Details view, which is where comments may be viewed or added.
The line in the layout that needs changing is
This is changed to as show as in the line below.
The view that is shown is now with a * instead of the Download button.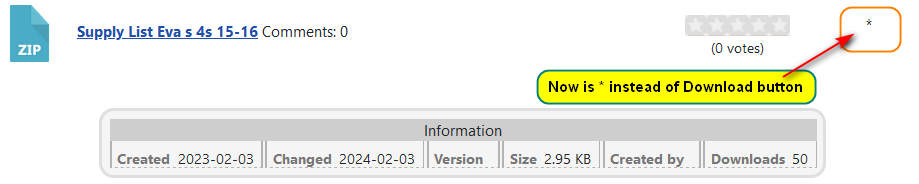
The above modification prevents the Download button showing and preserves the space and format of the layout.
Again after completing the edits to the Download layout, ensure You click on
The objective in removing the {url_download} is that the user will have to click on either the Download title or the icon so the user goes directly to the Download Details view which is where comments may be viewed or added.
The image opposite shows a view of a Download Details page with comments.
Get JComments for Joomla 4 and 5
The first steps are to download the latest version of the JComments component and then the appropriate jDownloads plugin to add to JComments after it is installed.
To download JComments click on exstreme organisation (opens ina new window/tab). Now scroll down to find or a later version if available. Click on it to download the zip file and save on your device in a suitable folder.
To download JComments click on exstreme organisation (opens ina new window/tab). Now scroll down to find
Installing JComments 4
The next step is to install the JComments Component.
In the Joomla main dashboard click on
.Now either browse for or drag and drop the JComments zip file onto the page like the one shown opposite. This will initiate installation of the the Component.
Whilst installation is in progress Joomla shows an 'In progress bar' as illustrated below.
After the installation completes it shows a view such as opposite.
Clicking on the
Install jDownloads Plugin
This Plugin is available in the Special Download(V4) section of www.jdownloads.com - JComments-Plugin 4.1 (opens in a new window/tab).
It downloads a file called com_jdownloads.plugin_4.1.zip. So save in a suitable location.
Extract the contents - I use the free 7zip.exe app from www.7-zip.org (opens in a new window/tab) .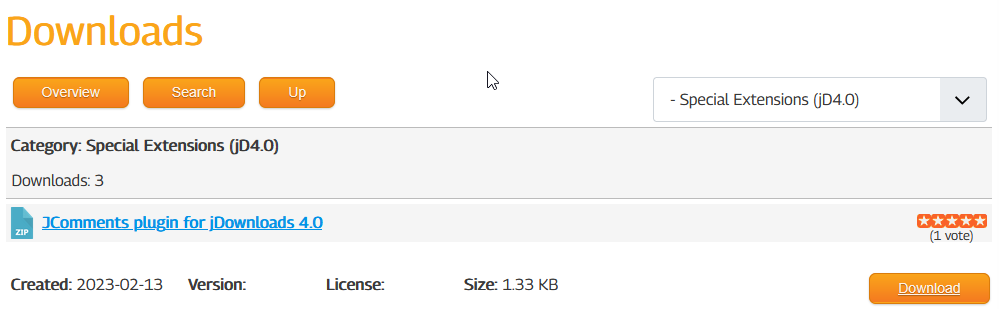
It downloads a file called com_jdownloads.plugin_4.1.zip. So save in a suitable location.
Extract the contents - I use the free 7zip.exe app from www.7-zip.org (opens in a new window/tab) .
The zip file only contains one PHP file which is called com_jdownloads.plugin.php and it is dated at 16/02/2023.
The next step is to copy the file com_jdownloads.plugin.php to <yoursite>/components/com_jcomments/plugins using an FTP utility such as File Zilla, your site control panel or a files manager extension.
Note: there maybe a file with the same name already at that location so overwrite it with the present one downloaded from jDownloads.
Configure JComments
The rest of the setup is carried out in the JComments Component. There are many customising options available in which you may explore depending on how you want the comments to appear, so consult the JComments documentation as appropriate. It is assumed here that you have succesfully installed the JComents component as it is like installing any component.
Here we set up just the minimum necessary to allow adding comments to Downloads. These are setting which Categories is allowed to Access and the Permissions granted to each User Group, such as which Groups can add comments, publish comments and so on.
When you have completed the setups as noted below, it is perhaps useful to 'experiment' a little with the JComments settings to get the style you want. Remember you need to set up each JComments User Group that is to be allowed to add comments.
When you have completed the setups as noted below, it is perhaps useful to 'experiment' a little with the JComments settings to get the style you want. Remember you need to set up each JComments User Group that is to be allowed to add comments.
Setting up JComments 4
Click on  in the list of Components, then on
  . This shows a set of tabs,
  with various settings. Also at top right of there is an
  button which shows more settings. Some of these settings may be duplicated!
Note: We are not JComments 'knowledgeable' so in case of querries contact exstreme There is some documentation at RoundTheme (opens in a new window/tab) which may be useful.
Note: We are not JComments 'knowledgeable' so in case of querries contact exstreme There is some documentation at RoundTheme (opens in a new window/tab) which may be useful.
First select Categories from the JComments options and choose which Categories are to be included for adding Comments.
Usually it is simplest to allow All Categories as shown opposite.
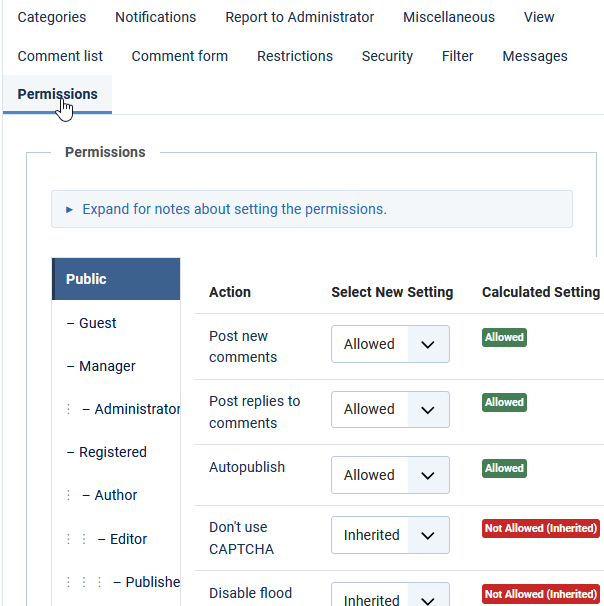
Next at top right select . Then click on the  tab. This allows configuring which user group is allowed to add available actions such as posting comments, posting replies, and similar.
There are about 40 settings for each Usergroup that are available so you may need to experiment with what is suitable for your requirements. Each setting has a useful popup with explanation.
For testing purposes I just set 'Post new comments' , 'Post Replies to coments' and 'Autopublish' as Allowed in the Public User Group.
Appendix 1 Migration from JComments 3
In the upgrade from Joomla 3 to Joomla 4 JComments needs to be uninstalled. Importantly the JComments database, which stores the setup and all the existing comments, remains in the database.
(1) make backup of site;
(2) make a copy or notes of the settings and the the access rules;
(3) uninstall JComments 3 (your comments will be saved in the database);
(4) after upgrading to Joomla 4 install JComments 4;
(5) run database repair (i) Click on then in the  section click on
  . It will show JComments in the list. If it shows
  then all is well. If it shows it needs attenions select JComments and use the
  button at top left.
(6) Go to in the System Dashboard, click on then, at top right, click on . Next select the tab and check that the permissions are as required.
It is also worthwhile examining all the tabs as a check.
(1) make backup of site;
(2) make a copy or notes of the settings and the the access rules;
(3) uninstall JComments 3 (your comments will be saved in the database);
(4) after upgrading to Joomla 4 install JComments 4;
(5) run database repair (i) Click on
(6) Go to
It is also worthwhile examining all the
Appendix 2 JComments Documentation
Below are some of the links to JCOMMENTS documentaion found on the web. It is assumed that JComments is fundamentally the same as earlier versions.
https://www.roundtheme.com/docs/item/configuring-and-maintaining-jcomments (opens in new page/tab)
https://www.joomlatune.com/jcomments-developers-manual.html (opens in new page/tab)
https://www.joomlatune.com/jcomments-developers-manual.html (opens in new page/tab)
ColinM Nov 2014, revised Oct 2015, May 2016, September 2019, May 2023, August 2023, January 2024, April 2024, May 2025, Sept 2025, May 2026