 ownloads Documentation Centre!
Using the Content Plugin in Articles and Modules
Introduction
This article concentrates on using the Content plugin to show Downloads in Joomla! articles. The Plugin may also be used in Custom Modules and in Download Descriptions.
Note: If you have allowed Registered Users to create Content then be aware that in Joomla! Global Configuration - Text Filters that the default for Registered is 'No HTML'. You need to set to say 'Default Forbidden List'.
Configure jDownloads Content Options
This part of the Cont Plugin setup is treated in more detail in the article Content Plugin Options (opens in a new wndow/tab)
To access the Content Options click on  in the main Joomla admin menu. Then click on
  , next click on
  . Now click on the
  at top right and finally on the
  tab which lists the relevant setup otions.
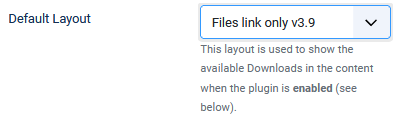
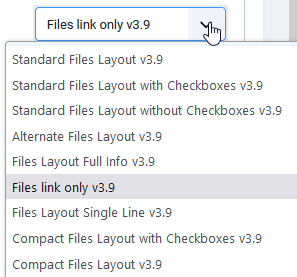
Select Default Layout
The first option 'Default Layout' allows you to select which layout to use as the default
In the example above the default Content Plugin layout was set to 'Files link only'.
Other Options
Enable Plugin locally
Setting to ' Yes' is recommended. It enables the plugin locally but you still need to enable the plugin itself as noted later. Basically for the plugin to work both this setting and the usual enabling of a plugin need to be set.
Setting ' No' disables the plugin locally and reveals two further parameters. With one of thse you can inform users that the Content Plugin is locally disabled in the two additional fields that will appear below.
One of these is the 'Show disabled message?' which, when set to 'Yes' will let the user know about the local disabling.
The other parameter is about whether to show the original title or a specific message.
Show a truncated Downloads Description is a pulldown specifying how much of the description is to be shown. The defalt is 0.
Setting to '
Setting '
One of these is the 'Show disabled message?' which, when set to '
The other parameter is about whether to show the original title or a specific message.
Show a truncated Downloads Description is a pulldown specifying how much of the description is to be shown. The defalt is 0.
Select Download using Content Button
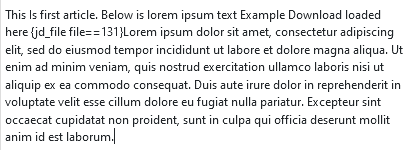
In the following the actual code needed in an article or module to reference a Download looks like the following .png) where the value 25 is the id of the required Download. This means finding the id value of the Download which can be tedious in the frontend. A much easier way in the front end is to use the 'Extended Editor' plugins as decribed below.
where the value 25 is the id of the required Download. This means finding the id value of the Download which can be tedious in the frontend. A much easier way in the front end is to use the 'Extended Editor' plugins as decribed below.
Remembering later what is say Download 48 in  can be annoying. But note you can also write
  where TestUpload-en is a reminder of the name. This works because the Content plugin ignores text following the file ID so it is not shown.
Using Extended Editor-xtd buttons
The first step is to enable the 'editors extended' plugins.
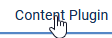
So click on the button then in the
  section click on
  . In the
  pulldown choose 'editors-xtd' as indicated opposite.
Enable the required plugins, including 'Button- jDownloads Content'.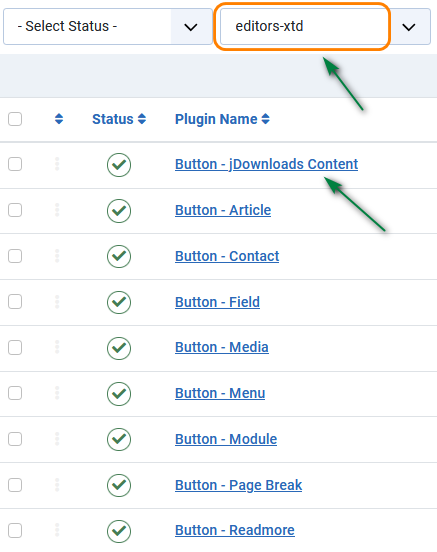
So click on the
Enable the required plugins, including 'Button- jDownloads Content'.
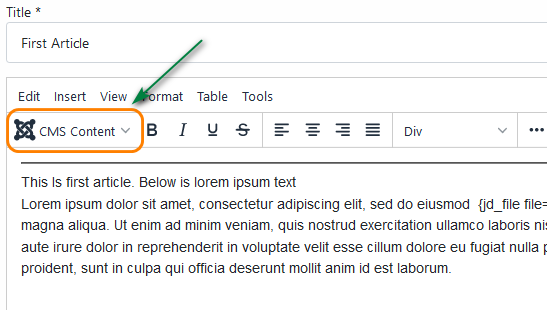
If you are using the 'Tiny MCE Editor' to edit in the frontend, the view is like the first image opposite.
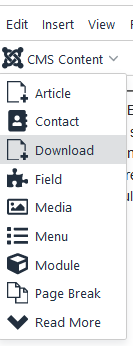
Note using the CMS Content pull down with its symbol lists the available extended editor plugins, as shown on the far right.
With the CodeMirror editor the buttons appear at the bottom of the edit page.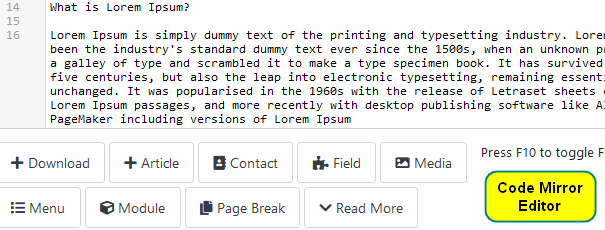
For the JCE Editor there is just a button on the front end toolbar in a position that is selectable in the JCE Editor Profiles.
Choose the relevant Profile such as Default and select the tab. Scroll down to the 'Current Editor Layout' section.
Drag the button from the 'Available Buttons & Toolbars' section to a suitable position in the current layout.
When you click on the button during editting it gives a pulldown like the one in the Tiny MCE Editor as shown opposite.
But there is one more action required!
Select the Options tab, then ensure that the 'Prepare Content' field is set to Yes as indicated opposite.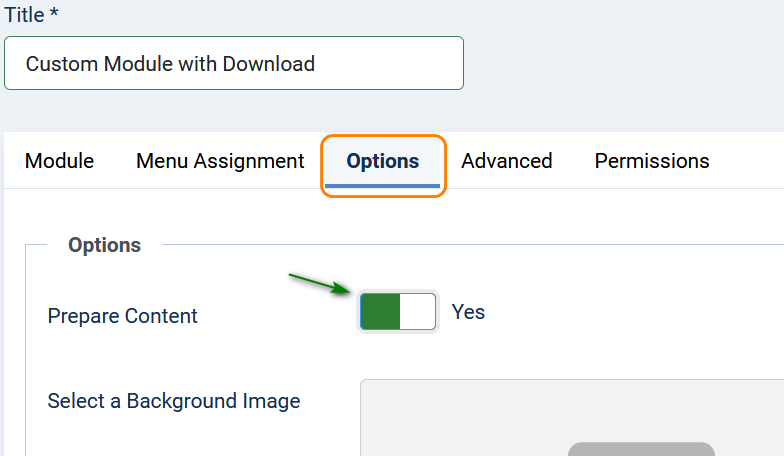
It maybe that the Downloads are to be listed with some text as shown opposite.
Layout "Files link and icon" is used in this example.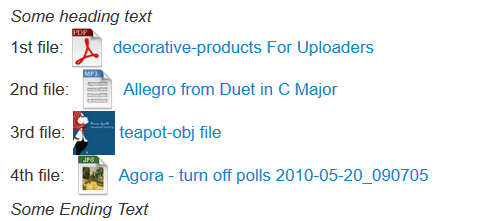
This example shows a listing of all the Downloads in a specific category.
Again the layout "Files icon link and featured" is used.
The code used is simply

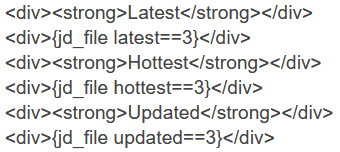
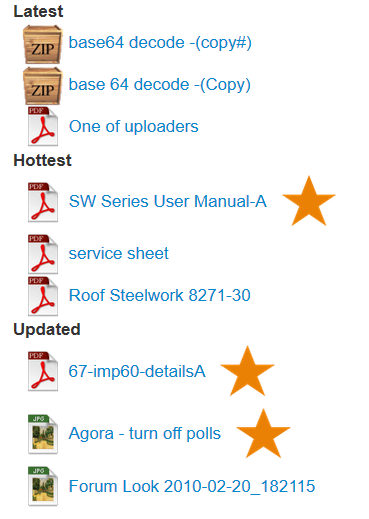
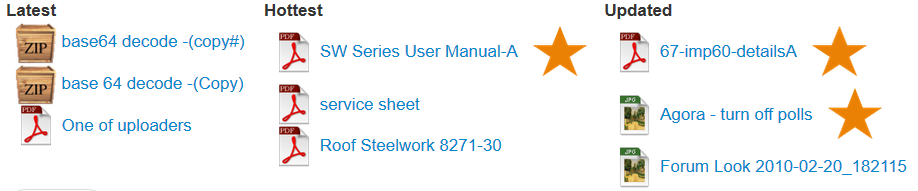
And now examples of Latest, Hottest and Updated.
Only the top 3 in each case are shown in this example.
Layout "Files icon link and featured" was used.
The code is as shown below.
Colin Mercer February 2019, updated July 2020, May 2023, August 2023
Note using the CMS Content pull down with its
With the CodeMirror editor the buttons appear at the bottom of the edit page.
For the JCE Editor there is just a
Choose the relevant Profile such as Default and select the
Drag the
When you click on the button during editting it gives a pulldown like the one in the Tiny MCE Editor as shown opposite.
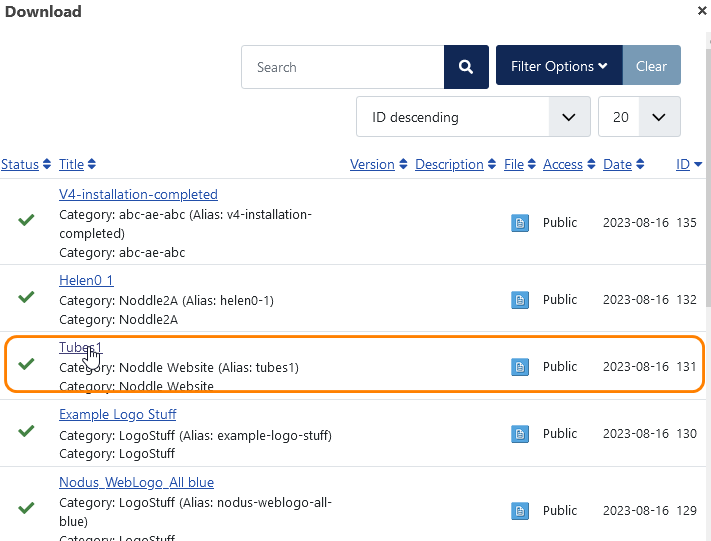
To insert a link to a Download click on the  . This will then give a view such as opposite. This enables searching for the Download by title.
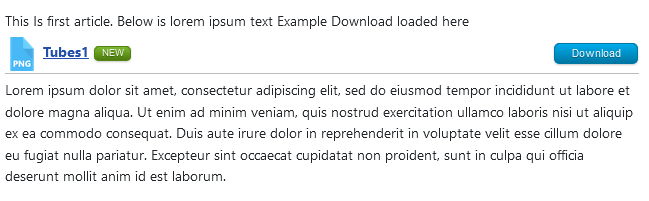
In this example we have selected Download 'Tubes 1', which has an id of 131.
The text in the editor view looks like below when the relevant Download is selected.
 And in the frontend we have the view
 In this example the default layout specified in the jDownloads
 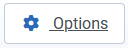 -
- is 'Files Layout Single Line v3.9'.
In this example we have selected Download 'Tubes 1', which has an id of 131.
The text in the editor view looks like below when the relevant Download is selected.
And in the frontend we have the viewIn this example the default layout specified in the jDownloads -View in Articles, Modules and Descriptions
Use <div> not <p>
If you are using a basic editor such as Code Mirror or similar then the Content Plugin code would appear as opposite, where in this example the id of the Download is 25.
Using a conventional WYSIWYG type editor such as JCE the entry in the article would look like the image below.
Again the Download and its surrounding text is again in a <div> ... </div> block.
Note that the JCE editor may be set to show the type of 'block' element.

Again the Download and its surrounding text is again in a <div> ... </div> block.
Note that the JCE editor may be set to show the type of 'block' element.
So, as might be expected, the result appears as a single line in the Front End.
In this example the Download layout is 'Files link only v3.9'
In this example the Download layout is 'Files link only v3.9'
Now let us see what happens if a Paragraph block <p> ... </p> is used instead of a Div block <div>...</div>.
The direct code as entered is shown below.
 But in this case there is a line break immediately before the Download link in the front-end view!

The direct code as entered is shown below.
But in this case there is a line break immediately before the Download link in the front-end view!The reason is quite simple. The basic HTML definition of a Paragraph is that it cannot hold another block element such as <div>. This is consistent with ordinary language where a Paragraph does not contain an 'internal paragraph'. Hence the browser automaticly generates a line break.
Use In Custom Modules
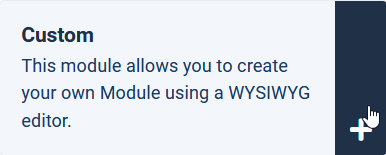
To create a Custom Module go to → →  select the
  button. Search until you find the Custom panel as shown opposite. Then click on the
  button.
Adding a Download link to a custom module is the mostly the same as adding into an article.
Adding a Download link to a custom module is the mostly the same as adding into an article.
But there is one more action required!
Select the Options tab, then ensure that the 'Prepare Content' field is set to Yes as indicated opposite.
Layout selection
The default layout for use in content is set in the jDownload Options - Plugin Tab.
A more flexible solution is to select the required layout in the content itself by using the form: jd_file onlinelayout=='layout name'
For example, . This must of course appear in the article before the first actual Download that is to use the layout.
A more flexible solution is to select the required layout in the content itself by using the form: jd_file onlinelayout=='layout name'
For example,
Any Download layout may be used. In these notes we use the simplest layout called 'Files link only' which comes as standard with jDownloads.
There are two other variations of this layout: 'Files Link and icon' and 'File link icon and featured' layouts. These are available either by downloading from Extra jD 3.9 Download Layouts (opens in a new window/tab) and using the Layouts button or by simply editing the Files link version as noted in the Edit layout Appendix below.
The examples below are the views when using a Download whose title is 'decorative products'.
There are two other variations of this layout: 'Files Link and icon' and 'File link icon and featured' layouts. These are available either by downloading from Extra jD 3.9 Download Layouts (opens in a new window/tab) and using the Layouts
The examples below are the views when using a Download whose title is 'decorative products'.
- Files link only -----------------
 This is a standard default Downloads layout which comes with jDownloads.
 - Files link and icon --------------
 Never shows the featured star.
 - Files icon link and featured ---
 Only shows feature star if Download is featured.
Some Examples
Individual Downloads
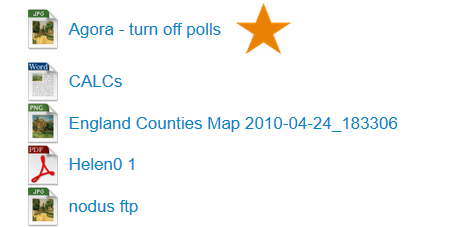
It maybe that the Downloads are to be listed with some text as shown opposite.
Layout "Files link and icon" is used in this example.
The direct code is shown opposite.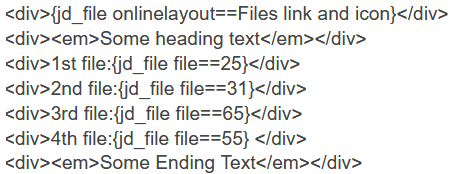
It is also possible to show several Downloads as an unordered list.
Here the Downloads are contained in a <ul> ...</ul> rather than a <div> sequence.
It could of course be an Ordered list by using <ol> ... </ol>.e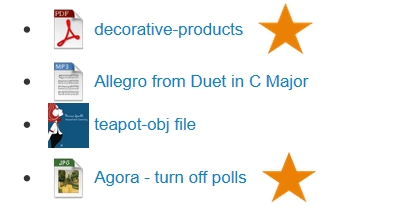
Here the Downloads are contained in a <ul> ...</ul> rather than a <div> sequence.
It could of course be an Ordered list by using <ol> ... </ol>.e
The direct entry or code view would be: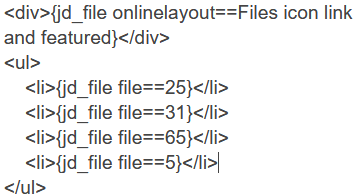
From Categories
As well as inserting individual Download links there are also Content Plugin calls to list Downloads from Categories
- Show Downloads from a single or several Categories: For example
 will list upto 12 Downloads from those categories with IDs 15, 3, 41 and 6.
 - Listing latest, top and last updated from any category:
 lists the 6 most recently updated Downloads selected from the categories with IDs 17, 3 and 15.
 - Listing latest, top and last updated from multiple categories:
 lists the 5 most downloaded Downloads from the categories with IDs 12,13 and 3.
This example shows a listing of all the Downloads in a specific category.
Again the layout "Files icon link and featured" is used.
The code used is simply
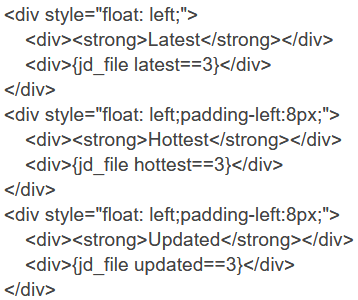
And now examples of Latest, Hottest and Updated.
Only the top 3 in each case are shown in this example.
Layout "Files icon link and featured" was used.
The code is as shown below.
With a little more effort the sequential listing could be arranged in columns as illustrated.
In this case the direct code would be as below.
In this case the direct code would be as below.
Some Technical Details
When the Plugin code is generated from the short code { ... } then jDownloads adds specific CSS class names to the plugin's enclosing <div> dependent upon the actual form of the plugin.
For example with a file short code such as then the plugin code itself starts with

For say a Hottest short code the plugin code starts with
 This then allows each type of Content plugin to have its own styling. For instance in the three column example above each column could have had its own background colour.
For example with a file short code such as
then the plugin code itself starts withFor say a Hottest short code
the plugin code starts withThis then allows each type of Content plugin to have its own styling. For instance in the three column example above each column could have had its own background colour.Appendix 1 - Editing Layout
The standard 'Files Link Only' layout is very simple. It is straightforward to edit the existing layout to create the other two layouts.
The first step is in the backend go to the jDowndoads Control Panel and select Layouts. Next select the Downloads layouts and click on 'Files link only V3.9'. This shows the line .
.
Now click on the button which will create a new layout called
 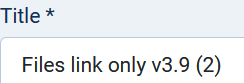 .
.
So edit the title to become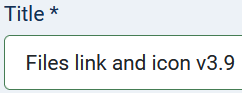 .
.
Edit the layout code layout by adding where indicated by the yellow background to give
 Next click on
  and you now have the additional layout.
Whilst the details of the layout are still on screen click on.
This will create a new layout called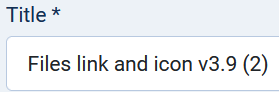 so edit the title to become
  .
.
The next step is to add the code to give
 where the code has been inserted as idicated by the yellow background.
Finally click on the .
.
The first step is in the backend go to the jDowndoads Control Panel and select Layouts. Next select the Downloads layouts and click on 'Files link only V3.9'. This shows the line
Now click on the
button which will create a new layout called .So edit the title to become
. Edit the layout code layout by adding where indicated by the yellow background to give
Next click on Whilst the details of the layout are still on screen click on
. This will create a new layout called
so edit the title to become .The next step is to add the code
to givewhere the code has been inserted as idicated by the yellow background.Finally click on the
Colin Mercer February 2019, updated July 2020, May 2023, August 2023